Wednesday, December 28, 2011

December Food Edition 5 - Macadamia Toffee

This recipe has been copied from a hand written recipe in a friend's collection, so I am unsure of its origin.

225g (1 cup) white sugar
80ml (1/3 cup) water
200g unsalted macadamia nuts*

*I did two batches, one with 200g macadamias, which seemed way too many, next one with about 50g, not enough. I reckon somewhere in between, depending on how nutty you want it.

Combine white sugar and water in a heavy saucepan over low heat. Cook for 5 minutes or until sugar dissolves. Increase heat to high and bring to boil. Cook - without stirring, occasionally brushing sides down for 5-7 minutes until golden. (The colour changes quite rapidly, so keep an eye on it. I burnt the first batch, although it was quite tasty!). Reduce heat to low, add macadamia nuts, and cook for 1-2 minutes stirring until nuts are covered. Pour onto lined tray (baking paper). Allow to set - I just left mine on a chopping board on the bench overnight covered up and it was set nicely. Coarsely chop or snap with your hands.

I served this alongside a chocolate torte with double cream at a family christmas lunch.
My first attempt at toffeeeeeee


Gluten free chocolate torte

The one at the front is the burnt one, with far too many nuts, the one at back much closer to what was intended.

December Food Edition 4 - Orange and Passionfruit Melting Moments

One of my BFFs has problems digesting gluten, so I had a crack at some gluten free yoyo's / melting moments. Recipe is here: http://gourmettraveller.com.au/orange_and_passionfruit_yoyos.htm from Gourmet Traveller - I replaced the plain flour with plain gluten free flour - buy in any good supermarket.


A nice short biscuit, not too sweet. I wished the orange was a little more prominent, but they were nice. Paler that normal yoyos containing custard powder.

December Food Edition 3 - Early Christmas Dinner

A few weeks before Christmas we decided to throw a dinner party as a spur of the moment thing, for our wonderful local 'family'. We ate well -  a big roast leg of lamb, spuddies in rosemary, dutch carrots cooked in red wine vinegar, thyme and garlic (smashing!), sweet potato, pumpkin, greens... followed by xmas pudding and brandy custard. There were great plans for yorkshire puds to soak up the yummo sauce, but I got a little distracted by the cider supplied by one of my guests!


Lamb, with rosemary, garlic and anchovies stuffed into those little slots.


They're bloody gorgeous, wish I'd taken a photo when they were cooked.

Nice pair of jugs!


I may get killed for this, but here are the wonderful people that I got to spend my early Christmas dinner with! Love them.


Anyway, happy Christmukkah one and all. Hope you got to eat some smashing food, with some smashing people like I did!

December Food Edition 2 - Peppermint Chocolate Fudge

My lovely husband sometimes says there are two things in this world that you shouldn't watch being made - laws and sausages... but I think there's a third part to this...

I call this stuff fudge, although... dear foodists, I know its not truly 'fudge', but it feels, looks and eats like fudge, so for today, we're going with that.

Blitz 2 packets of chocolate ripple biscuits in the food processor (or bash up in a bag with a rolling pin if you have no FP). Melt 1 large block of peppermint filled chocolate (I used cadbury peppermint block, see photos) together with 125g unsalted butter. [I used microwave, but a bowl over saucepan of water probably works too!]. Put biscuits, chocolate/butter mix and a can of condensed milk into a large bowl and mix like crazy until combined. It gets pretty sticky. When combined, tip into a slice tray lined with baking paper. Heat up a dessert spoon under hot tap water, shake off then use the back to smooth out the top of the "fudge". Give the tray a bash on the bench for good measure too. Grate a Peppermint Crisp chocolate bar over the fudge, and if you like, drizzle melted white chocolate over too. Pop in the fridge overnight. Cut into small pieces (its quite rich). Trim off the messy edges first if you have high standards - I personally find this a great shame and waste of fudge, so enjoyed eating the trimmed off bits for breakfast!  I gave this away at Christmas and it increased my street cred imensely! Forget the ingredients, and enjoy!

Blitzed chocolate ripple biscuits

Cadbury Dairy Milk Peppermint


Condensed milk, chocolate ripple bickies, melted chocolate and butter. Heaven on a stick...

Yes, I made two batches at once - I call it multitasking, you might call it "Erica doesn't have forearms big enough to stir a double batch all at once, what a wuss".

Before the 'setting'

Set.


The pieces are "small". Trust me.


Tuesday, December 27, 2011

December Food Edition 1 - Apricot Jam


My camera cable has been found, and I have finally been able to download hundreds of pictures off the camera, and write in my blog!

I'm thoroughly enjoying being on holidays for a few weeks over Chrissy and new year, and have been making the most of the time off, making copious amounts of jam, fudge and many other sweet treats.

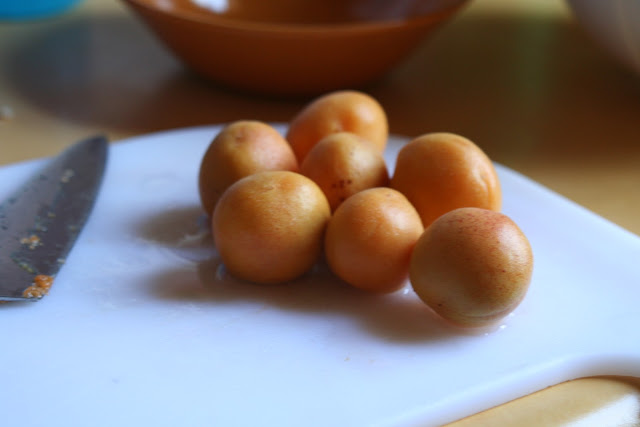
Our stone fruits are in various stages of ripening, and being eaten by hungry birds. The apricots are always first, so my story will start with apricot jam.

Apricot Jam
This is our third summer living here, and hence my third crack at apricot jam making. Previous years I have shared my fruit, but this year there was less (we haven't been able to water much, as the river pump is out of action, and we have only one house tank)... so I kept it all to myself. I did share the finished product around though of course!

I ended up making 3 big batches over 2 days, using Stephanie Alexander's recipe from Cooks Companion. I managed to get it to set (somewhat) without adding any pectin, just the last few lemons off the tree.

Apricot Jam Recipe
1.5kg apricots, firm-ripe rather than soft,
1 cup water
2 tablespoones lemon juice
1.5kg sugar

Wash, halve or quarter the fruit and remove stones (don't throw them away...)
Preheat oven to 160 degrees Celcius.
Put the apricot stones inside a teatowel and crack them open with a meat mallet (probably a nut cracker would do the job, but I don't have room for one in my kitchen!) Extract the kernels and set aside. Discard all the debris, making sure that none of the sharp shell falls into the kernels - they would really hurt to crunch into!

Put water, fruit and lemon juice into non reactive saucepan, bring slowly to boil. Simmer about 20 mins, or longer if you like your jam less chunky. Meanwhile put sugar into oven on a tray and warm it to hand-hot in the oven. (A note here, I find the 160 deg oven is simply too hot to do the job [my hand-hot is a lot less that 160] and a bit of a waste of energy, next time i'll just put the oven on as low as possible and bring it to hand-hot). Suit yourself. Add warmed sugar and reserved kernels to pan, stirring until sugar dissolves, then boil rapidly for about 15 mins or until setting stage. Pop into hot, sterilised jars including the kernels.


Apricot Kernel peeking out from hard shell

Kernels


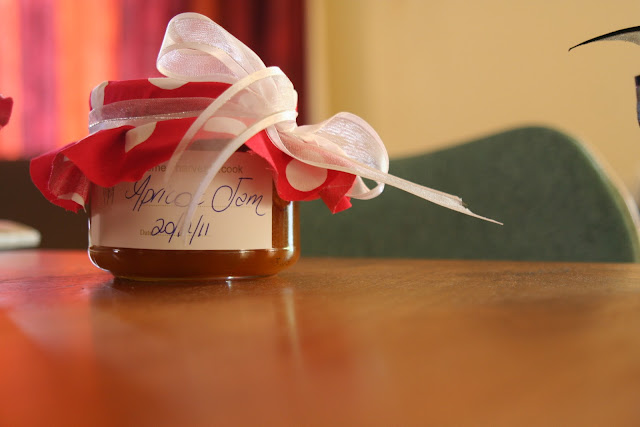
The finished product - notice my special birthday gift in action - HHC labels from my awesome friend Cathy!


I hope you enjoy the recipe, and those of you who received a jar under the Christmas tree on Sunday, please let me know what you think!

Coming up next... Peppermint and Chocolate Fudge...!

Saturday, September 24, 2011

Chewy Choc Chip Cookies

  • 2 cups plain flour
  • 1/2 teaspoon baking soda
  • 1/2 teaspoon salt
  • 170g unsalted butter, melted
  • 1/2 cup white sugar
  • 1 egg plus another yolk
  • 1 cup packed brown sugar 
  • 1 tablespoon vanilla extract 
  • 2 cups chocolate chips

Line cookie sheets with baking paper and preheat oven to 165 C.

Sift flour, baking soda and salt and set aside.

 
In a separate bowl, mix melted butter, brown and white sugars until well blended. Beat in egg, egg yolk and vanilla extract until creamy. Add dry ingredients and stir until combined. Stir in the choc chips (today I used a mixture of small milk chocolate chips, and large white choc melts). Put heaped tablespoon sized balls (shape by hand) onto baking sheets, and leave plenty of space in between as they spread.

 
Bake for 12-15 minutes. They should be lightly brown around the edges, but still look and feel slightly uncooked in the middle. Remove from oven and leave to cool on trays for a few minutes, then move to cooling racks.

Friday, September 23, 2011

One degree of separation

My husband gave me the 'Gourmet Farmer' series 1 DVD for my birthday earlier this month, and we have been thoroughly enjoying working our way through it. Matthew Evans (Sydney food critic) takes you on a journey as he moves from the big smoke and rat race, to a farm in Tasmania, where he grows his own food, mixes it with the local foodies and cooks up some inspiring meals. If you've ever seen River Cottage (Hugh Fearnley Whittingstall's empire), its pretty similar, just as enjoyable, and he calls ingredients by their aussie -known name (zucchini instead of courgette, eggplant instead of aubergine... you get the idea)! Both these guys are great inspiration and source of information for food lovers, or people like us who are eager to increase the productivity of our little farming plot and get that pendulum swinging further in the direction of self-sustaining, rather than supermarket reliant!

http://www.sbs.com.au/shows/gourmetfarmer

Matt Evans introduces his vision for food sourcing:
to either:
 1. grow it himself,
 2. source it directly from the grower, or
 3. source it from someone who knows the person who grew it by name.
The idea is that the food has up to only one degree of separation from the farm to your source, none if you can help it.

This had me thinking. Could we be getting more of our food from growers that we can actually talk to? I headed off to my local butcher this morning, and was pleased to purchase beef that he grows on his own farm in Kotupna (about 40 kms from where I purchased it), and pork that his friend and neighbour grew. 

This got us onto a conversation about free range chicken. He sells Hazeldene chicken, which he said isn't free range, although advised that he can buy in free range chook - but usually cant sell it as well as his Hazeldene's products - for one simple reason. Free range costs more. If I want to buy it, I have to commit to 6kg minimum lots. Better get a deep freeze.

Think about the difference in eggs that come from free range chooks, compared with cage or "barn' chickens. Non-free range eggs are pale and anaemic looking.  They don't have that gorgeous bright orange yolk. And their taste doesn't compare. The same applies for the meat that comes out of them. Do you really want to eat meat from a bird (or any animal for that matter) that has spent its life in a cage too small to build up enough speed to raise a sweat!? Never experienced natural light? Thanks, but I'm not putting that in my body. For me, the argument is ethical, as well as nutritional.

So the butcher tells me this morning that the local supermarket chain selling free range chicken in those bright green plastic trays is in fact, 'gas flushed'. He explained this means that all the air is removed from the meat (kind of like the cryovac process), then preservative gas is pumped back in, which doubles the shelf life. Hmm. Delicious?? Ok... what are my alternatives? Grow it myself. Get the free range from the butcher which has a total kill to plate life of 7 days max. Yep, let's do that.

I'm going to have a go at living Matt Evan's philosophy grow it, get it straight from the grower, or someone that knows the grower. The supermarket will be the exception (the back up plan), not the rule.

Wish me luck!


Snow peas from our friends' garden, picked last night. Total carbon miles = 8.


Eggs from our gorgeous happy girls, including one super sized (101g) laid this morning. Tomorrow's breakfast. This is what I love about nature! Imperfections. Blue egg from the Araucana.


Quince

Its not the right time of year, but here are some photos of honey baked quinces I did a few months back.

Quinces oxidise very quickly, but I don't think it impacts on the delicious flavour. The skin is pretty tough. I've done this recipe before and removed the skin, but I think they work best if you leave it on, as the skin holds all the juice inside. The skin is yummy and softens once its baked.

This is Stephanie Alexander's Honey Baked Quinces, from 'Cooks Companion' which is our home's most referenced book. Unfortunately I didn't get any shots of the finished article, but they turn ruby red when done, you drizzle the pan juices over when serving. Good with yoghurt or double cream. But double cream goes with everything!

Ingredients

  • 3 Quinces
  • 80grams butter
  • 4 tablespoons honey
  • 1/4 cup water

Method

Serves: 2-3
  1. Pre-heat oven to 150 C.
  2. Halve but do not peel quinces, then remove pips and core from each with a spoon to make a neat hollow.
  3. Select a gratin dish that will hold quince halves snugly and grease with 1/3 of the butter.
  4. Arrange quinces halves hollows uppermost. Divide remaining butter and honey between hollows and pour water gently around sides.
  5. Cover with foil and bake for at least 3 hours until quinces are soft and a rich red. (Turn quinces over after 1 1/2 hours)
  6. Serve hot or warm with hollows filled with honey juices and offer thick or clothed cream.